I really like using WordPress as a CMS platform, but did not want to run it in the Linux environment. I have a lot more experience with Windows servers, and wanted to be able to use WordPress as a CMS front end to some of our other applications which are done in the .NET environment. That being the case, I don’t want to spend the time managing two different server environments if I don’t have to.
Overall, WordPress works well on Windows servers, but finding information about how to best set it up is difficult compared to the information for Linux. So here are a few tips which have been helpful to me. I assume you have access to the server. Note: all tips apply to WordPress on Windows IIS 7 or later.
IIS URL Rewrite
In order to enable SEO-friendly permalinks in WordPress on a Windows server, you’ll first need to install Microsoft’s IIS URL Rewrite which can be found at http://www.iis.net/downloads/microsoft/url-rewrite
This module lets you set up friendly URLs like “http://example.com/sample-page” using the Permalink settings in WordPress.
Once you have installed IIS URL Rewrite, create or edit a web.config file in the root of the web site and include the following section:
In WordPress > Settings > Permalinks pick the kind of permalinks you want. WordPress will tell you to make changes to the web.config, but you will have already done that. I don’t recommend giving the WordPress user write permission to web.config (see Permissions below).
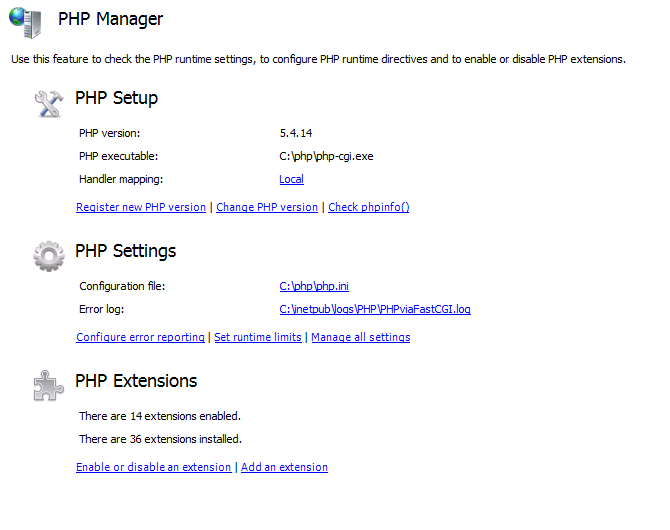
PHP manager
PHP Manager for IIS is another helpful tool that allows you to view and set php.ini settings from within IIS. You can find it at http://phpmanager.codeplex.com/documentation.
PHP.ini
When hosting multiple websites or applications on a server, it is a good practice to keep them self-contained without access to other parts of the server.
In PHP, the open_basedir directive restricts access for a site to the directories specified. You can have separate PHP.ini files for each site with this directive or you can add a site-specific reference in the master PHP.ini file like this:
[PATH=C:/inetpub/website1/]

open_basedir ="C:\inetpub\website1; c:\inetpub\php_upload_tmp"
The PATH section should refer to the website root directory. In the open_basedir directive, include the root of the website and the php temporary upload directory. The upload direcotry is specified in php.ini with this line:
upload_tmp_dir = "C:\php-uploads"
The default temporary directory is C:\windows\temp but you can create a directory somewhere else or even create site-specific tmp directories outside the web site.
Website Application Pool
One of the trickier things about setting up WordPress in IIS is the context in which the website runs. For public websites, IIS has two accounts – one for the application pool and one for the anonymous user. IUSR is the default anonymous user, and the application pool identity is IIS AppPool\<app pool name>. The AppPool identity is part of the built-in IIS_IUSRS group.
Permissions need to be set correctly for each of these in order for WordPress to operate correctly.
Permissions
Give IIS_IUSRS and IUSR read and execute permissions on the web site and IUSR modify rights on the wp-content directory. Also, remove execute rights from the wp-uploads directory.
** Important **
You must also give IUSR and IIS_IUSRS rights on the php uploads tmp directory specified in the php.ini file. Otherwise, uploaded files don’t keep the correct permissions. When files are copied from the temporary upload directory to their destination, they retain the permissions of the tmp directory. They are not given the permissions of the destination directory, so make sure the tmp directory has the same permissions as the WordPress destination.
WordPress can also be installed in a more automatic process using the Microsoft Web Platform Installer, but that doesn’t give you as much control over the MySQL, PHP, and IIS settings . For our deployment process from stage to production, the process is smoother for us to go with the manual installation and the settings we want.

